Showing posts with label Food. Show all posts

Tuesday, March 22, 2011

Rice vermicelli and Tuna salad

If i had known that rice vermicelli and canned tuna make such a good combination, I would have tried this salad earlier!
This is pretty much a 'mix it the way you want' salad Experiment with salad dressing of your choice,and I guess it would mostly taste good!

Ingredients:
Tuna - 300 grams canned/cooked
Chilly sauce - 1 table spoon
Soy sauce - 1 table spoon
Sun dried tomatoes - 2 table spoons
Pepper - 1 teaspoon
Rice vermicelli - 1 pack
Olive oil - 1 teaspoon
Salad leaves - a bunch of leaves of you choice. Spinach, rocket, lettuce, watercress... (optional, you can also substitute with veggies like carrots) 
Lime - juice of half a lime

Method:
Boil and drain the rice vermicelli.
Toss together rice vermicelli , soy sauce, chilly sauce, olive oil, pepper in a bowl.
Once mixed evenly add tune, sun dried tomatoes and salad leaves.


Add in a dash of lime and serve.


Thursday, March 17, 2011

Reducing starch from Rice

Don't we all know, that cutting down on rice in our daily diet will help reduce stored fat in our body? Rice is a grain and  digest very quickly, much quicker than meats, or nuts. When they digest, they turn to simple sugars for quick energy. If the energy is not used right away the energy is stored as fat.


I love rice. I cannot live without it. Being a South Indian and coming from a household that eats rice three times a day has made me a rice lover , can I say.. devotee.
So in order to fit rice into my diet , keeping in mind my daily schedule which does not involve much of  physical exercise, I had begun to find out ways to cook rice better. I wanted to cook rice in ways which would to make it nice and light and fluffy, removing as much of starch from it as possible.
This method however, works best with white rice( rice that is white in colour) .I haven't tried this with the other varieties of rice (red, brown, black).
This is for all those who love rice but are scared of its starch content.

Rinse rice well before cooking, this helps in removing loose starch making it less sticky. For some varieties like basmati rice where the starch content is very high, soaking the rice in water for 20 minutes also helps remove the starch.
Boil water in a pot. Take about 4 times the amount of water as compared to the amount of rice.
Once water starts boiling briskly, put the rice in and stir well.
Do not cover pot , let the rice boil in the water.
If you like to add salt to rice, add salt now.
After 10- 15 minutes, stir rice around in the pot and check if it has got cooked . This can be checked by   squeezing a grain between your fingers. If the grain is soft , the rice has been cooked well. Some might like their rice overcooked while some like it just about right. Cook rice to the level you want it to be cooked.
Once rice is cooked, drain the rice in a colander.  In this way a lot of unwanted starch from the rice is removed through the water.
Another way of draining is to close the pot with the lid and tilt the pot until all water is drained out. This way the steam and heat still remains in the pot. The rice can be kept closed in the pot for some more time, allowing the rice to cook more.

This method of boiling and draining rice is better than simmering where the rice to soaks up all the water it cooks in as the water would have a lot of starch.
The difference can be felt while you eat rice cooked in this manner. It is lighter on the stomach and it will not give a  full feeling after the meal.

Choy Sum Thoran - Stir fry with Grated Coconut

I am very fond of buying veggies that arent commonly found in India and trying to adapt them to the Indian way of cooking. Some of them turn out very well, whereas some are best left as they are!
This time I bought a few bunches of choy sum from the market. Since it looked like a green leafy vegetable and leafy vegetables go well with the indian flavours , I thought I will try out a thoran ( stir fry with indian spices).
Choy Sum is used to describe the edible stem of chinese cabbage.


Ingredients:

Choy Sum - 2 cups finely chopped
Oil - 2 teaspoons.
Mustard seeds - 1/2 teaspoon.
Cumin seeds - 1/4 teaspoon.
Dried red Chilly - 3 nos. cut into half.
Turmeric powder - 1/4 teaspoon
Grated coconut - 1/2 cup.
Curry leaves - 1 springs.
Garlic - 2 cloves finely chopped
Green chillies - 2 nos.
Shallots (kunjulli) - 2 nos finely chopped
Salt - 2 teaspoons

Method:
Heat the oil in a pan and add the mustard seeds and cumin seeds.
Once the mustard seeds splutter, add the curry leaves and dried red chillies. Sauté for 10 seconds.
Now add chopped Choy Sum, turmeric and salt. Cover and cook for 5 minutes. Since Choy Sum has a good water content in it like most leafy vegetables, water need not be added.

Once the Choy Sum is cooked and all the water has evaporated, add grated coconut and mix well. Cook the dish for another 2-3 minutes.

Delicious Choy Sum thoran is ready.

Friday, March 11, 2011

Beetroot Steak and Chips

After having tried many Indian dishes with Beetroot, I wanted to try something new and head straight for Google. Thats when I stumbled upon two new dishes - Beetroot Chips and a Finnish dish called Punajuuripihvit - which I will refer to as Beetroot Steak.

Here is how you go about preparing them.

Ingredients
Beetroot Chips -
Beetroot - 1 nos, thinly sliced
Oil - 3 cups for deep frying
Salt - for seasoning

Beetroot Steak -
Beetroot - 1 nos, sliced into thick circular or semi-circular discs
Eggs - 2 nos
Bread crumbs - 1 cup
Salt - 1/2 teaspoon
Pepper - 1/2 teaspoon

Method


Beetroot Chips -
Heat oil in a deep pan and bring it to temperature required for deep frying.
Once heated, put in the thinly sliced beetroot and fry them until they become crisp. This can be identified by the absence of bubbles while frying. The procedure is same as preparing potato chips.
Remove them from the oil and place them in a plate covered with tissue paper - this is to soak the excess oil. After removing the excess oil, season the chips with Salt or any other seasoning agent.

Serve the chips hot with ketchup or any dip of your choice.

Beetroot Steak -
Break two eggs and beat them until they are mixed well. Add salt and pepper to this and mix well.
Dip the thickly cut beetroot discs in the eggs and coat them with bread crumbs.
Place a non stick pan on the stove and add a few drops of oil. Once the pan is hot, place the beetroot disc in the pan.

Let the side cook for two minutes and then turn them over to cook for two more minutes or until the bread crumbs coating the beetroot turn light brown.


Serve the steak with ketchup or any dip of your choice.


Monday, March 7, 2011

Capsicum in Cashew gravy

There are many ways to cook capsicum and this is one very delicious way of making it. A family friend from Andra makes this deliciously and I wanted to try it out. It is usually made with ground nuts, but since I did not have ground nuts , I used cashew nuts.
A tasty but rich ( thanks to the cashews) gravy, ideal with rice or chapathi.

Ingredients:

Capsicum - 2 nos , diced into cubes
Onions - 1 nos, diced into cubes
Tomato - 1 nos , diced into  cubes
Cashew nuts - 1 cup roasted
Green chillies - 3 nos
Turmeric powder - 1 teaspoon
Cumin seed - 1 teaspoon
Mustard seeds - 1 teaspoon
Tamarind pulp - 1 teaspoon (optional)
Garlic - 2 cloves
Dry red chillies - 3 nos
Curry leaves - 1 sprig
Jaggery / brown sugar - 1 teaspoon ( optional)
Garam masala - 1 teaspoon ( Alternatively you can use 2 cloves and 1 small stick of cinnamon)
Salt - 2 -3 teaspoons
Oil- 3 teaspoons

Method :
Grind cashew nuts, green chillies, tamarind, garlic and jaggery in a blender and make a smooth paste. Add water as required.
Add oil to a pan. Once the pan is hot add in the cumin seeds and mustard seeds. Allow it to splutter.Add red chillies and curry leaves.
Add the dices capsicum, onions and tomatoes and saute till they become soft.

Add turmeric powder and mix well.
Add the cashew nut paste made before and salt. Add more water if required .Cover and cook for 15- 20 minutes.
The gravy tastes best when it is thick, so be careful to not make it too watery.

Serve hot with rice or chapathi.


Tuesday, March 1, 2011

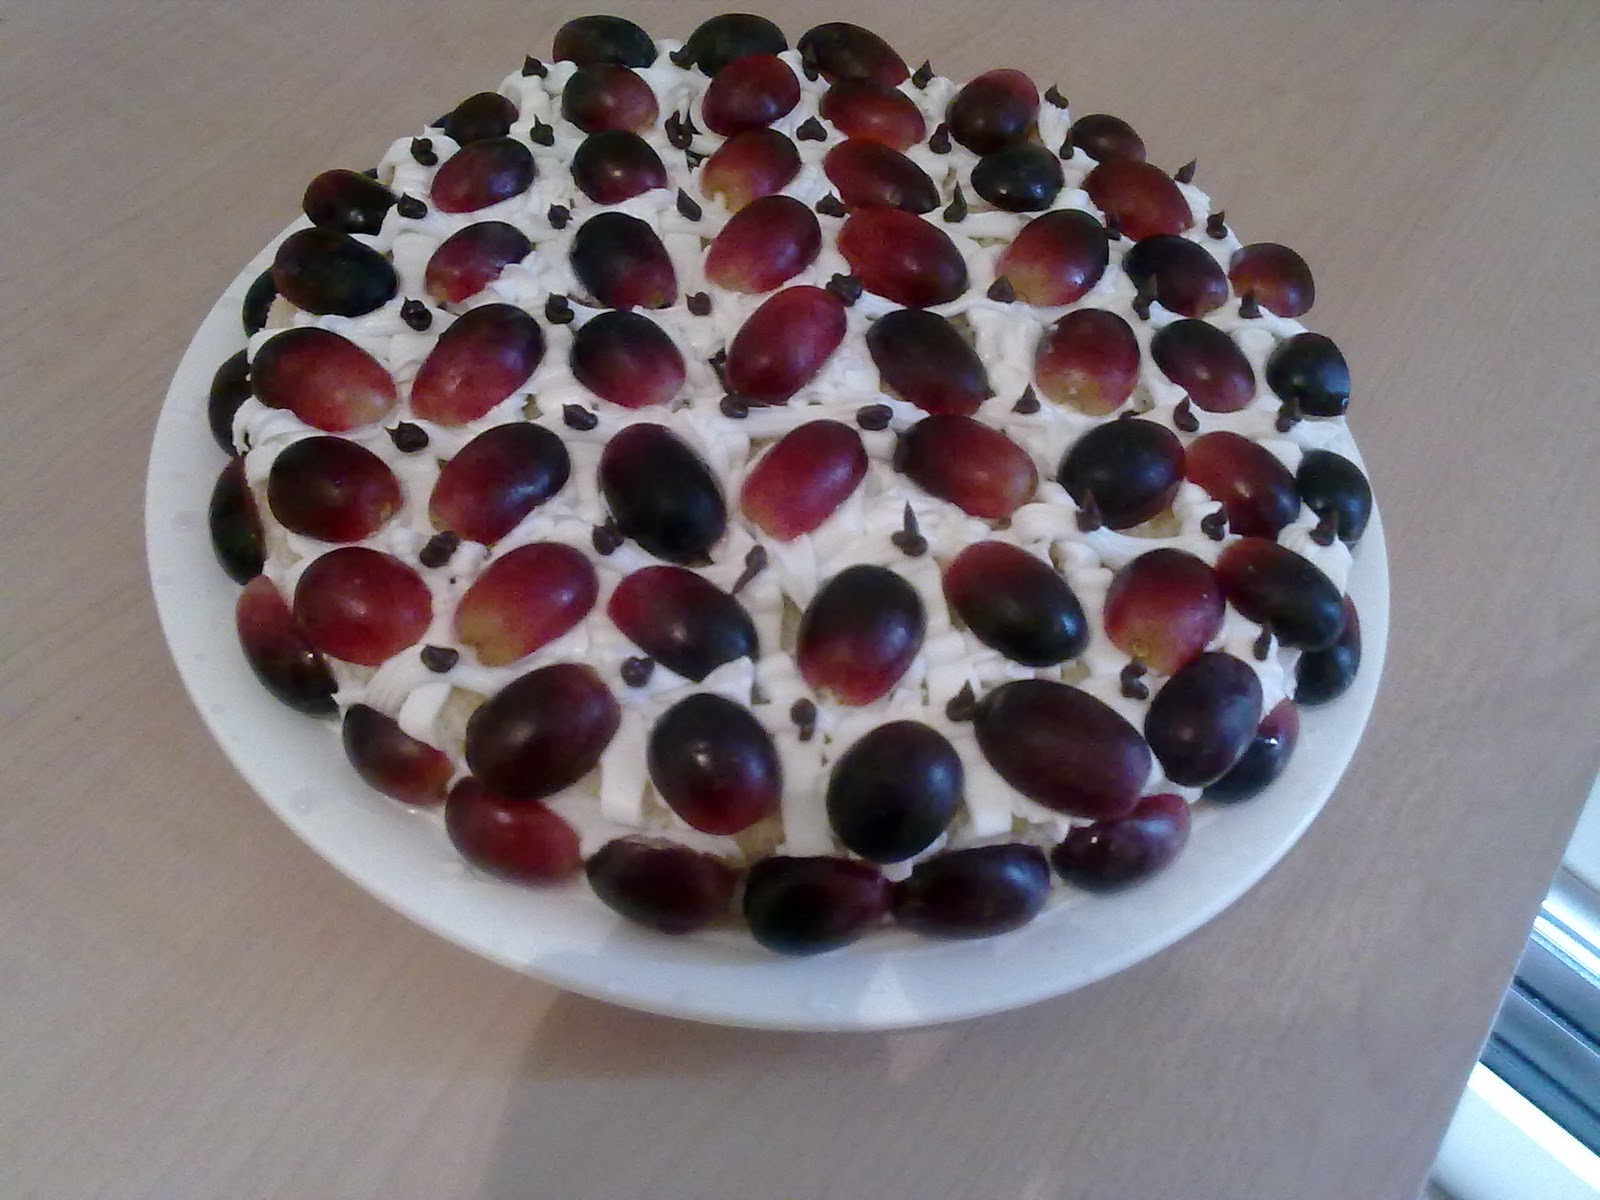
Microwave Grapes Cake

My husband loves grapes. It was his birthday a couple of days ago and I had got an idea to bake a grapes cake for him. A cake with something he loves so much. Since I had only a microwave oven with me, I was not sure how the grapes cake will turn out in the microwave. To my surprise, the cake came out fine. Though the cake by itself was dry, when dressed with some frosting and fresh grapes, it tasted wonderful.
Ingredients:
Grapes - a bunch , seedless
Self raising flour - 1 cup
Sugar - 3/4 cup
Eggs - 4 nos
Extra virgin Olive oil - 1/4 cup
Milk - 1/3 cup
Vanilla essence  - 1/2 teaspoon
Cocoa powder - 1 teaspoon (optional)
chocolate chips - a handful (optional)

Method:
Mix the flour and sugar well to form a uniform mixture.
Now break the eggs and add them to it. Add milk and olive oil and mix well. Do not mix with a brisk motion as it can make the cake hard by removing all the air in it. Fold in the mixture making sure that there are no lumps.
I made a marble cake base. You can omit the below steps if you are going to make a plain cake.
Keep aside a couple of tablespoons of the batter and pour the remaining on to a cake tin.
To the batter that is kept aside, add the cocoa powder and mix in evenly.
Pour the cocoa mixed batter on top of the vanilla batter in the cake tin. Use a knife or a spatula to draw out lines of the cocoa batter through the cake.
Slice a handful of grapes into small discs and place them on top of the cake. Also add in the desired amount of chocolate chips.

Microwave at high power for 4 - 5 minutes depending upon the power settings of your microwave.
The Grapes cake is ready.
For decoration, I cut the cake along its height into two pieces.  Added some frosting and grape slices and placed the other half on top.


I also covered the whole cake with frosting and decorated the whole cake with grapes. It was a yummy and homely cake, perfect for a quite and personal birthday celebration!


Saturday, February 26, 2011

Carrot Rice - Easy One Pot Meal

On a lazy day what can be better than a meal that can be made in just a pot? One such lazy day I decided to cook up a meal with some carrots and rice in a pot, I did not want to take the pains of  cooking the rice first and tossing in the carrots. Here is the recipe for a one pot delicious carrot rice.

Ingredients:

Carrot - 1/2 cup grated
Onions - 1/2 cup finely chopped
Green Chillies - 3 Nos , finely chopped
Rice - 1 cup
Butter - 2 teaspoon
Salt - 2 teaspoon
Cumin seeds - 1 teaspoon
Mint leaves - 2 teaspoon, finely chopped
Garam masala - 1 teaspoon ( optional , you can also substitute this with whole spices 1.e cardamom, cinnamon and bay leaves
Ginger and Garlic paste - 1/2 teaspoon
Cashew nuts - 8 - 10 nos toasted ( optional)
Water - 2 cups

Method:

Wash and soak rice and keep it aside.
Melt butter in a pan and add cumin seeds. Add onions and saute them till they turn translucent.
Add Garam masala and green chillies and saute for a minute. Add ginger, garlic paste, carrots,mint leaves, salt, cashew nuts and saute for a couple of minutes.
Drain the rice and add it in the pan . Mix it well with the other ingredients.
Add 2 cups of water. Close the pan and cook until all the water is absorbed or the rice is cooked.


Toss the rice with a fork and serve with yogurt or salad :) 


Wednesday, February 23, 2011

5 minute chocolate cake in the microwave

Complete satisfaction in the kitchen comes from a good moist chocolate cake. To be able to make a very good one in 5 minutes is absolutely amazing. Its so quick and easy that I am mostly tempted to replace my evening tea with a chocolate cake!!
This is an easy and simple to mix batter. Thanks to the numerous posts over the internet on this easy cake. I have tried using the same batter for cupcakes, cake in a mug ( this is the easiest option) or even as a base to a wonderfully decorated cake. It works well in most chocolate cake based dishes :)
Below is the recipe for a quick cake in a coffee mug. you can make a bigger cake by maintaining the same proportions for the ingredients.

Ingredients:

Self Raising flour - 4 tablespoons , you could also use 4 tablespoons of plain flour with a pinch of baking soda
Sugar - 4 tablespoons
Egg - 1 nos
Cocoa - 2 tablespoons
Oil - 3 tablespoons
Milk - 3 tablespoons
Chocolate chips - Optional and As per preference, I like to fill my cake with them!!

Method:

Mix the flour, sugar and cocoa in the largest coffee mug you have.
Add egg, milk and oil and combine them well. make sure to avoid any lumps.
Add the chocolate chips and mix them in.
Bake in a microwave oven on high power for 2 to 3 minutes.  If you are making a bigger cake, you might have to bake it for 4 - 5 minutes depending on the power of your microwave.


Gooey and messy but delicious :)


And thats it! The chocolate cake is ready. This cake will turn out a little dry so allow it to cool and top it with whipped cream or sugar syrup to moisten :)


Topped with frosting and fresh strawberries


Tuesday, February 15, 2011

Pidi - Rice Dumpling Soup from Kerala

On one of the many cold Melbourne evenings, all I wanted was a bowl of warm and comforting goodness, that would take the wanderer in me back home! Thus was born the idea to make pidi :)
This is a dish from the Malabar regions of Kerala that my mother makes when she feels really lazy to cook anything else. This is one complete dish in itself - rice dumplings cooked in curry. Usually it is chicken or mutton curry. Pidi or rice dumplings can also be made in itself without the curry by cooking it in coconut milk. What I have here is a cross between the two, in an effort to encourage vegetarian food habits - Pidi in tomato curry with coconut milk, a comforting dumpling soup.


Ingredients :


For the Pidi:
Roasted Rice Flour -1 cup
Grated coconut - 1/4 cup
Garlic - 2 cloves crushed and finely chopped

Cumin seeds -1 teaspoons
Shallots - 2 nos crushed and finely chopped
Salt - 1 teaspoon
Water - 2 cups

For the curry:
Thick coconut milk - 1 cup
Tomato - 3 nos , sliced
Onion - 3 nos, sliced
Green chillies - 2 nos
Frozen green peas - 1/2 cup thawed (optional)
Clarified/melted butter - 2 teaspoons
Curry leaves - 2 sprigs
Turmeric powder - 1/4 teaspoon
Chilly powder - 1/2 teaspoon
Coriander powder - 1 teaspoon
Water - 3 cups
Salt - 2 teaspoons

Method:

To make the Pidi:
Boil water in a wide pan and add salt. Once water is boiling briskly, add chopped garlic and shallots.
Switch off the flame and immediately add roasted rice flour, coconut, cumin to it and knead well with a spoon. The Mixture would be hot so kneading should be done carefully. Knead to make a soft dough. Make small marble sized balls out of this mixture and keep aside.
Since the flour is mixed with boiling water, it would have got partially cooked. We can add these balls directly into the tomato curry and cook them together. Alternatively, you could also steam these in a steamer.

To make the curry
Heat clarified / melted butter in a pan on low flame and add curry leaves, green chillies and onions. Fry till the onions soften.
Add turmeric powder, chilly powder and coriander powder and saute for a few seconds until the spices heat up.
Add the sliced tomatoes, green peas and water. close and cook until the tomatoes soften.
Add the Pidi balls to this. You can flatten the balls to make small discs. This will help it cook better.
Cover the pan and cook for 20- 30 minutes.

After 30 minutes, open the pan and pour in the coconut milk. Let it simmer in a low flame for another 5 minutes.

Pidi in tomato curry is ready . Serve into a bowl. Perfect for a cold and calm evening!

Tuesday, February 8, 2011

Beetroot Gothambu dosa - Indian Wheat Pancake with Beetroot

I love cooking beetroot because of its attractive colour and the character it lends to a dish. Of the various experiments I have carried out in the kitchen with beetroot, very few have turned out bad! So, here I have one more easy and healthy beetroot recipe.
Wheat dosas are common in south India. It is usually made with wheat and a mix of spices like cumin seeds, chopped ginger , onion, chilly and curry leaves. At times I take the liberty of introducing few veggies into the dosa like carrots, finely shredded spinach etc. This is a try with beetroot. You can do the same with carrots or any other veggies you find interesting.

Ingredients:
Wheat flour - 1 cup
Water - 1 1/2 cup
Onions - 1/4 cup finely chopped
Beetroot - 1/4 cup finely chopped
Ginger - 1/2 teaspoon finely chopped
Green chilly - 1/2 teaspoon finely chopped
Curry leaves - 2 sprigs finely chopped
Salt - 1 teaspoon

Method:
Mix all ingredients together to form a batter. The consistency of the batter should be of that of pancake batter. depending on the wheat flour used, the water required may be a little less or more.


Heat a frying pan. if you are not using a non stick frying pan, you can spray a few drops of oil to grease it.
Pour a spoon full of batter on the pan and spread it out into a circle.
Let it cook on one side for a couple of minutes. When one side is cooked and it gets a brown colour, turn the dosa over and let the other side also cook.
A couple of minutes on each side will be enough for the dosa to be cooked completely.


Serve hot with coconut chutney :)


Thursday, February 3, 2011

Beetroot Sambar Vada - Crisp Savory Indian Doughnuts in Beetroot and Lentil Stew

Ah Vada! That one absolute favorite snack. Vada for breakfast, vada for lunch, vada as an evening snack and vada for dinner also (the dinner option is not quiet healthy!). I wont complain :)


Making vadas at home is quiet easy. Though it might take a few attempts to master the art! The perfect vadas are made when the consistency of the batter, the heat of the oil used for frying and the time for which the vadas are fried are all 'just right'. Hitting the 'just right' mark for these might need some practice,  but if done carefully you will have perfect vadas after the first few you fry. It is not unusual for the initial try to come out with oily or mushy vadas.

Coconut chutney and sambar are wonderful accompaniments for the vada. This time I tried a new variation to the traditional sambar vada, and made the sambar with beetroot. The beautiful red colour beetroot gives to the sambar and the inside of the soaked vada adds to the taste! 

Ingredients:
For the Vada:
Black gram ( urad dal)- 2 cups
Shallots - 4 nos finely chopped
Salt - 2-3 teaspoons
Green chillies - 2 nos finely chopped
Pepper - 1 tsp whole pepper coarsely crushed
Curry leaves - 2 sprigs finely chopped
Ginger - 1 teaspoon finely chopped
Oil - for deep frying

For the sambar:
Beetroot - 2 nos diced
Potato - 1 nos diced
Split pigeon pea (tuvar dal) - 1/2 cup
Tamarind paste - 1teaspoon
Sambar powder - 1 table spoon. This can be bought from any Indian store 
Mustard seeds - 1 teaspoon
Curry leaves - 1 sprig
Dry red chilly - 1 nos
Vegetable Oil - 1 teaspoon
Asafoetida - a pinch
Salt - 1 - 2 teaspoons 


Method:

For the vada:
Wash and Soak urad dal in water for 4 hours. After 4 hours, drain out the water and grind the dal in a blender.The batter made should be coarse and not too watery, so just add a little bit of water if required. If you want to made the vadas in the shape of doughnuts then the batter should be thick enough to be shaped by your hands.

To the ground batter add salt, shallots, green chillies, pepper, curry leaves and ginger and mix well.
Heat enough oil in a pan for deep frying.

To make doughnut shapes with a hole in the middle, pat your hands with water, take a spoonful of the batter in your hands. Use your thumb to poke a hole through the batter and carefully drop them in oil. Fry them till golden brown.

The easier method is to pour spoonfuls of the batter into the oil and fry them till golden brown.You will get round ball shaped vadas. I prefer doing it this way :)

For the sambar:
Cook tuvar dal in a pressure cooker until they are soft.  
Heat oil in a pan and add mustard seeds. Wait for the mustard seeds to splutter.
Once done add curry leaves, dry red chilly, asafoetida, sambar masala and saute for a few seconds. 
Add in the cooked tuvar dal, beetroot, potatoes, salt and the tamarind paste.
Add water to get the gravy to the consistency required. Cover and cook on medium heat until the vegetables are cooked.
Hot beetroot sambar is ready


To serve:
Soak  vada in sambar and let it rest for 15 - 20 minutes before serving.
Alternatively, you can also dip vada in hot water and squeeze the remaining water out without spoiling the shape of the vada. Then soak in Sambar and serve immediately.


You can make vadas and have them with coconut chutney, soak them in yogurt and make delicious thair vada, soak them in Rasam and make delicious rasa vada.  You can also try this with any sambar with the vegetable of your choice! There are quiet a few options.


Wednesday, February 2, 2011

One Hot Chai Tea Latte Please.....

I am a big chai fan and since chai is now available in all cofee shops, chai tea latte has become a 'staple' drink for me.
Chai has become a popular drink around the world. In most households in India, chai is made without the spices but Chai around the world is synonymous with the Indian masala chai, made with a blend of spices.
Chai can be made from green or black tea, though the strong black tea variety is preferred as it gives the right colour and taste.

Tea on the whole is a healhier option over coffe and cold beverages. Like in various fruits, vegetables , nuts and meat, antioxidants are also present in tea in good amounts. Green tea is said to be  helpful for LDL cholesterol, cancer, inflammatory bowel disease, diabetes, liver disease and even weight loss  by increasing metabolic rates.

Black tea, having the highest quantity of caffine in them, is not very popular as the other varieties. black tea also has anti oxidants, but not as much as the other varieties. I have come across some studies that sugest that the health benefits of black tea are just as good as the green tea, but since the green variety gets studied more, it overshadows the black one.

Chai is made with a combination of spices. The combination can vary from recipe to recipe, but the most commonly used spices are cardamom, cinnamon, cloves, ginger and pepper.
Each of these spices have great health benefits and theses have been used in preparing herbal/ ayurvedic medicines for ages.

Oh! after all these good things about tea.. I must say that too much of good is also bad for you! Tea does have chemical compounds that fall in the  'compounds that are not too good for you' category . These are flourides, caffines and tannin.

I dont drink tea keeping in mind all these health benefits ( or side effects). I just love the smell, colour and feel of nice hot milk tea, any time of the day :)  I very often have the urge to go out and drink a good Chai tea latte and so I figured out making one at home is definitely the more pocket friendly option!! So heres how to prepare a nice hot masala chai.

Ingredients: ( for 2 cups of tea)
Black tea leaves - 2 heaped teaspoon ( 1 teaspoon for each cup)
Water - 1 1/4 cup
Milk - 3/4 cup
Sugar - to taste
Fresh ginger - 1/4 teaspoon crushed
Cinnamon powder - 1/4 teaspoon
Cloves - 1 whole
Cardamom - 2 pods crushed

Method :
Place a pan or kettle with water and milk on a stove on high heat and bring it to a boil.
Add the spices i.e ginger, cinnamon powder, cardamom and cloves and stir well.
Reduce the flame and allow to simmer until the milk starts rising again. Add the tea powder , stir  and allow it to simmer for 5 minutes. Remove from flame, cover and keep for a couple of minutes.
Use a strainer to strain the tea into cups, to remove the tea leaves and any solid piece of spice.
Add the required quantity of sugar to the cup and stir.

If you have a espresso machine at home, you can make the chai latte with nice frothy milk. To do this make tea in the above method without adding the milk. The frothy milk can be added in the end along with the sugar.
The method of making chai can be different form place to place and the recipe can be diversified to suit ones tastebuds. Be careful not to boil the tea leaves as the tea can turn bitter.

A wonderful aromatic cup of chai early morning and I am ready to face the day :)


Tuesday, February 1, 2011

Red Cabbage and Egg Burji - Egg scramble with red cabbage

While I go shopping for fruits and veggies, I try to buy one vegetable or fruit that we rarely eat and try out something new with them.  This week red cabbage gets a chance :)
Red cabbage has a very attractive colour. Once cooked the red colour turns blue. This is because the cabbage contains a pigment called anthocyanin which changes colour when it comes in contact with an alkali. In order to retain its violet colour a bit of vinegar or any acidic fruit can be added. I like to leave it blue :)
Egg burji can be made with the normal green cabbages and it tastes wonderful. Here is a recipe for egg burji with red cabbage.


Ingredients:
Eggs - 3 nos beaten
Red cabbage - 1/4 cup finely chopped
Onions - 1/4 cup finely chopped
Tomato - 1/4 cup finely chopped
Oil - 1 tsp
Ginger – 1/2 teaspoon minced
Garlic – 1/2  teaspoon minced
Chilies – 1 teaspoon finely chopped
Coriander/Cilantro – handful finely chopped
Coriander Powder – 1/4 teaspoon
Garam Masala – 1/4 teaspoon
Cumin Powder – 1/4 teaspoon
Turmeric Powder -1/8 teaspoon
Salt – 1/2 teaspoon


Method:
Heat oil in a pan and add onions, ginger, garlic and chillies. Cook till the onions become translucent. 
Add in the dry spices i.e , coriander powder, garam masala, cumin powder and turmeric powder. Saute for 30 seconds or until the heady aroma of the spices start hitting your nose.
Add tomato, red cabbage, cilantro and salt. Pour in half a cup of water and cook covered until the cabbage is cooked. This will take about 7 - 9 minutes. The red variety of cabbage takes longer to cook and also does not shrink like the green ones. I added some mixed sprouts. It is completely optional. 


Once the cabbage is cooked, add in the eggs and stir around until the eggs get cooked and set.


The egg whites with the red cabbage will turn blue, there is no need to worry as there is nothing wrong with it. The red cabbage pigment is an edible dye.


Saturday, January 29, 2011

Brocolli and Green Peas Curry - Stir fry with Indian spices.

Brocolli is a vegetable that closely resembles cauliflower. It can be boiled, steamed or even eaten raw. Brocolli is usually added in salads and stir fry, but due to its bland taste it does not interest me much. Here is a quick way of preparing a tastier Brocolli dish.
Brocolli is said to contain anti-cancer compounds such as sulforaphane and the best way to prevent the loss of this while cooking is to steam the vegetable. Hence to make this dish, we shall steam the Brocolli and green peas and saute it with the mixture of spices. 

Ingredients :-
Brocolli - 1 cup chopped into florets.
Fresh Green peas - 1 cup
Ginger - 1 teaspoon minced
Garlic - 1 teaspoon minced
Green chillies - 2 nos, finely chopped
Cumin seeds - 1/2 teaspoon
Coriander powder - 1 teaspoon
Turmeric powder - 1/4 teaspoon
Salt - 2 teaspoons
Chilly powder - 1/2 teaspoon ( optional, if you do not like it spicy , this can be omitted)
Garam masala - 1/2 teaspoon ( this can be bought from any Indian store. it is a blend of various spices like cloves, cinnamon, cardamom, fennel, mace, nutmeg etc)
Vegetable oil - 2 teaspoons


Method:-
Steam Brocolli and green peas for 4 - 5 mins. If you like the Brocolli crunchy, you can avoid steaming it.
Heat oil in a pan and fry the cumin seeds. Add ginger, garlic and saute them well. 
Once you get the aroma of the fried ginger and garlic add the onions and the green chillies and saute them till the onion becomes soft and translucent.
Add the powdered spices ( coriander, turmeric, chilly, Garam masala) and saute till you get the heady aroma of the spices.

Add the steamed Brocolli and green peas. Mix well with the onions and spices. Cover the vessel and cook on a low flame for 5 minutes.


Brocolli and green peas curry is ready and can be served on a bed of rice or with Indian bread ( chapathi).

Monday, January 24, 2011

Palak Dosa - Indian Rice Pancake with Spinach

It is wonderful when something healthy like Spinach is combined with something delicious like Dosa to give a yummy yet healthy dish. It is a very common thing in South Indian homes to make Dosa batter in good quantities. Palak Dosa is a quick wonderful variation from the normal dosas which are made quiet frequently in South Indian homes.

Here is my version of the Palak Dosa, which is quick and easy if the Dosa batter is available to u. Ready to make Dosa batter can be bought from any Indian store.

Ingredients:
Dosa batter - 3 cups .
Spinach leaves - 1 cup finely chopped
Onions - 1 cup finely chopped
Garlic - 1 clove finely chopped
Green chillies - 2 nos finely chopped
Oil - 3 tablespoonsPublish Post

Method:

If Dosa batter is readily available with you, you can skip this step and proceed.
*** To make Dosa batter:
Soak 1 cup of white lentil or skinless black gram (Urad Dal), 3 cups of parboiled rice and a teaspoon of fenugreek seeds in water for 8 hours. Drain the lentils, rice and fenugreek seeds and grind them in a blender to make a smooth paste. While grinding, make sure to add just the required amount of water to make the paste in a consistency similar to that of pancake batter. Add 2 teaspoons of salt to the batter and mix it well. Allow the batter to sit and ferment for 12 hours. While fermenting , the batter will increase in volume, so use a bigger vessel to allow room for the batter to rise. After 12 hours the batter is ready to be used.
***

Mix the chopped spinach leaves, onions, garlic and green chillies with to the Dosa batter.
Heat a griddle or tawa on the stove at medium high .
Once the griddle is hot grease it with a little oil. Pour the Dosa batter on the griddle using a ladle and flatten it out into a circle ( just as it is done with a pancake).
Pour few drops of oil on top of the Dosa and wait for it to cook. When the batter on the upper surface is set ( no longer runny or sticky) flip the Dosa over. the lower surface should ideally be in a light golden colour.
After one minute flip the Dosa over again to check if it has been cooked properly and both surfaces have tinges of golden brown colour to it.
The Palak Dosa is ready and can be served. To make the more dosas repeat the process starting from greasing the griddle with oil for each Dosa.


Palak Dosa tastes great with Indian curries, especially lentil curry called Sambar.


Friday, January 21, 2011

Tamara thandu thoran - Lotus root stir fry with coconut

Thoran is a very popular dish in Kerala and it is usually had as an accompaniment to rice. It can be made with a variety of vegetables and sometimes even meat and fish. Thoran is made by cooking the vegetables and then stir frying them with ground coconut and a few other spices. It is an everyday dish in the households of Kerala as it is an easy and healthy way of incorporating vegetables to you meal.


Lotus roots are rick in dietary fiber. When I found a pack of frozen lotus root in the Indian store, I got them home. Though I had never tried cooking them earlier, I had memories of my mother making chips out of them , by simply frying them in oil. This time I went a step ahead and made thoran out of them, and they were delicious.


Ingredients:
Oil - 2 teaspoons.
Mustard seeds - 1/2 teaspoon.
Cumin seeds - 1/4 teaspoon.
Dried red Chilly - 3 nos. cut into half.
turmeric powder - 1/4 teaspoon
grated coconut - 1 cup.
curry leaves - 2 springs.
garlic - 2 cloves.
green chillies - 2 nos.
shallots (kunjulli) - 2 nos.
salt - 2 teaspoons
lotus root - 500 gms chopped into small pieces
water - 1/4 cup


Method:
Grind together grated coconut,cumin seeds, green chillies, shallots, garlic cloves into a coarse mixture  in a blender and keep it  aside. Do not grind it too much, we only want a dry coarse mixture.
Heat the oil in a pan and add the mustard seeds. Once the mustard seeds splutter, add the curry leaves and dried red chillies. Sauté for 10 seconds. 
Now add the chopped lotus root, turmeric and salt. Add water, cover the pan and let it cook. Once the lotus roots are cooked and all the water has evaporated, add the coconut mixture and mix well. Cook the dish for 2-3 minutes.


Tamara thandu thoran is ready to be served.


Saturday, January 15, 2011

Peanut Chikki - Peanut Brittle

Making chikki was not a conscious decision. It all started when we were planning to visit my uncle for the first time and I wanted to take something special for him. After roaming around the shops hunting for the perfect gift for days, I still couldn't find anything special enough. Thats when I thought of edible gifts. Chikki  seemed perfect to pack and carry around and what more, its simple and straight forward to make!

The only difficult part in making chikki is melting the sugar, which requires a good amount of patience to get it right, without burning it. Chikki can be made with jaggery or brown sugar in which case it will require more time to melt.

Ingredients:
1 cup - coarsely ground peanuts
1 cup - sugar
2-3 tablespoons - Ghee, or melted butter , this is to help in cutting the chikki and is also used to grease the dishes to avoid the chikki from sticking to them.

Method:
Put 2 tablespoons of ghee and the sugar  into a pan and set the pan on low to medium heat on the stove. If it is the first time you are doing this, it would be advisable to put it on low heat and wait patiently for it to melt, as it is very easy to burn the sugar if heated on a higher flame. Never try this on a high flame else the sugar will burn and give a bitter taste to the chikki.
Once the sugar has started melting, it will start to form translucent clumps. Keep stiring the sugar constantly until all of the sugar has melted and formed a beautiful amber colour sticky liquid.
At this point we can add in the peanuts . Before adding the peanuts raise the heat  because once the peanuts are added the sugar can crystalize around the peanuts and you will not get the required consistency.
Pour out the well mixed sugar and peanut mixture out on a greased pan and flatten it out. You can also use a greased rolling pin to leavel out the mixture. If you like cutting the chikkis into perfect squares, you can do that at this point with a greased knife. Make sure that you pour the mixutre and roll it out before it cools. Once cool it solidifies quickly.

Once it is cool you can break it into small chunks with ur hands if you have not cut it into sqares already.


I bought a nice jar to pack these chikkis in and my uncle loved the gift :)


Friday, January 14, 2011

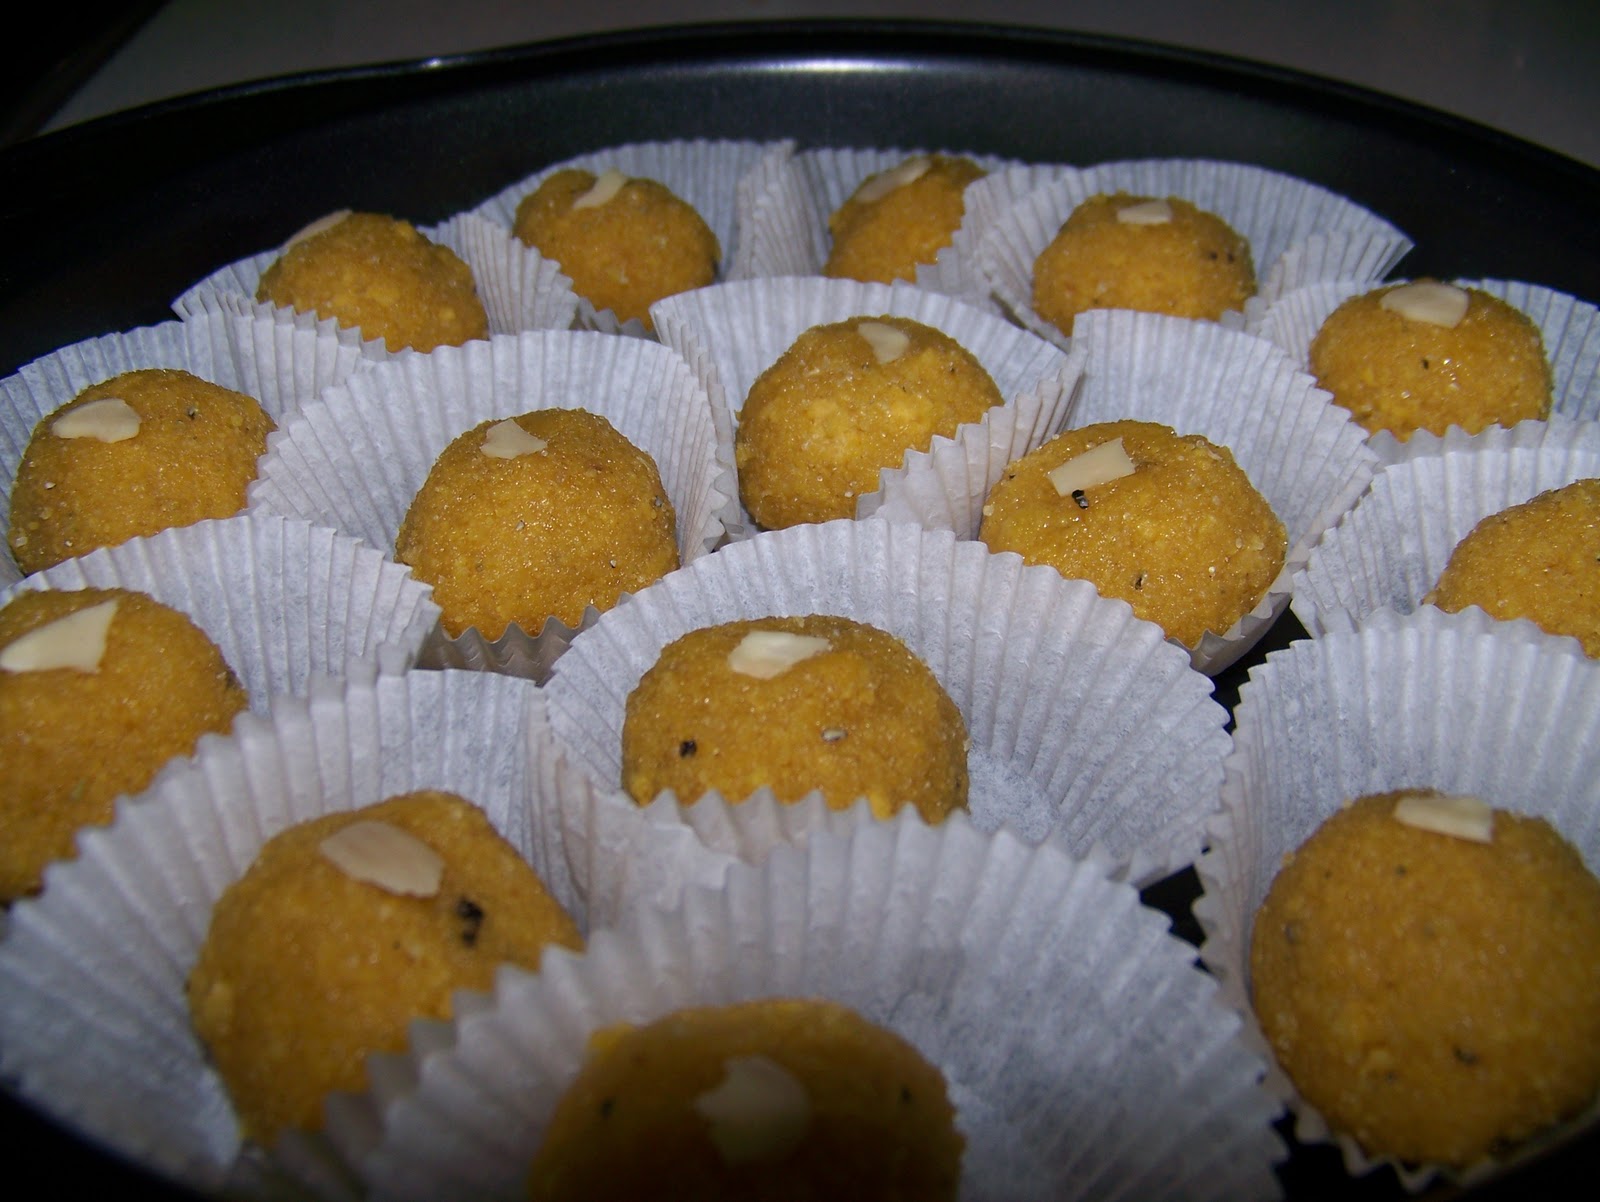
Besan Ladoo - Indian Sweet balls made from roasted chickpea flour

Its Sankranti morning and it has been raining cats and dogs!! Sankranti is celebrated in parts of India to mark the end of winter with the sun returning back to the northern hemisphere.  Rain cannot dampen the festive spirit  and isn't a festival incomplete without sweets?? :)
A lot of traditional Indian sweets are made to satisfy not just the taste buds but also the eyes and the noses ,hence making traditional Indian sweets turn out to be a time consuming affair, an art perfected by the experience and patience of the person making it. Having said that, i dint have much time on my hands to spend on making elaborate sweets, so i settled for ladoos. Ladoos are yummy yet can be made without many complications. Besan ladoos are sweet balls made from chickpea flour and are traditionally made by roasting or cooking the besan in a pan. Here is a quicker and easier version of the besan ladoo made in the microwave, which turned out to be delicious!!

Ingredients:
1 cup - besan (chickpea flour)
1/2 cup - ghee ( clarified/melted unsalted butter) - can be made by heating butter for a couple of minutes in the microwave
3/4 cup - sugar
2 teaspoons - cardamom powder
1/2 cup - milk - this is for binding and is an optional ingredient. Not needed if you are able to form perfect balls without the milk.
almond flakes - for garnishing

Method:
Mix besan and ghee in a microwave safe bowl. If your ghee is solid, warm it in the microwave to loosen it.
Microwave this mixture for 3 minutes, mixing after every 1 minute.
After 3 minutes , turn microwave power to low and microwave the mixture for 2 minutes, mixing after every 1 minute.
By this time the besan should be cooked and you should be able to smell the sweet smell of cooked besan, which is definitely not negligible! In case you are not able to smell the besan it means that it has not cooked well and a couple of minutes more in the microwave should be enough.
Allow this mixture to cool. By this, I mean the mixture should become warm from hot. Do not let the mixture become cold, this is because sugar mixes well when the mixture is still warm. Once the mixture is warm mix the sugar and cardamom powder in.
Shape the mixture into small balls using your hands. If you find the mixture too dry and are not able to make perfect balls, wet the mixture with a little milk and make the balls.
For garnishing, you can apply a little ghee on the balls and stick the almond flakes on them.
Besan ladoos are ready to be served. :)


Happy Sankranti to all :)